- UV/LED true gel polish with a 100% gel base for maximum durability and longevity
- Highly pigmented formula for superior color payoff, requiring fewer layers and saving time and money
- Premium quality product offered at a lower than market average cost, providing a great quality-to-price ratio
- Pro-grip handle designed with professionals in mind, ensuring a velvet smooth, slip-free application
For darker pigmented colors, we recommend 1-2 coats for full coverage.
For lighter/shimmery colors, you can build coverage with 2-3 coats or layer to add a little sparkle.
To ensure complete polymerization, usage of the light supplied by the manufacturer (en Vogue Nails) which matches the chemistry is highly recommended. Position the nails correctly under the lamp throughout the polymerization cycle and the appropriate length of curing time instructed by en Vogue which is tested to be full proof and effective for long lasting nails.
The appropriate times allocated to cure each layer of gel ensures correct polymerization.
DISCLAIMER
APPLY GEL IN THIN LAYERS
The gel must be applied in thin layers in order for the product to polymerize completely during the curing process.
Due to the nature of the ingredients, gel polish can cause a skin reaction when in contact with the skin. Gel polish should be used with care to maximize the product benefits without compromising the health of the skin around the nails. Here are our top tips to minimize the risk of a skin reaction.
Especially note when using very pigmented, opaque, highly pigmented or white-based gels, which block out more light. Gel applied too thickly will not polymerize completely and may cause a skin reaction.
We strongly advise you to cure all your en Vogue gels with the en Vogue Evolution and infusion lamp have been created and designed specifically for optimal curing of en
Vogue gels. If you experience a skin reaction, tingling, itching or notice a change in the appearance of your nails after using the products, remove the gel immediately and discontinue use until fully recovered.
We recommend removing your gel as soon as possible using the en Vogue
recommended technique and stop using gels immediately. We also recommend consulting a health care professional.
GEL REMOVAL
If nails have been damaged by forcing or peeling gel during removal, allow nails to fully regenerate before reapplying gel. If the natural nail is thinned too much, the ingredients
in the gel can penetrate through the weakened keratin layers which may cause a skin reaction.
PROTECTION
For lac it! Manicures, en Vogue recommends adding a protective coating of Fibre Gel to the nails for extra strength and protection from gel polish application/removal. Look for a step-by-step tutorial on our YouTube channel, @envoguenailsofficial.
Why is it hard to remove/taking a long time to soak-off? The seal wasn’t broken before soaking, the color of base coat application was too thick initially, it’s not being soaked for long enough.
Why is it rippling/wrinkled when it comes out of the lamp? Application was too thick, or it was under-cured. (Apply two thin, even coats and cure fully for 60 seconds LED/2 mins UV in a high-powered lamp).
Why is it not curing fully? It was applied too thick, not cured for the full time, or the UV/LED lamp is too weak. (If using a lower wattage lamp, try double-curing your products to ensure a full cure.)
Why is it chipping/peeling? The nail plate wasn’t properly prepped pre-application, I’m A Base was too thick or improperly applied, the free-edge wasn’t capped when applying product.
Why is it shrinking when being applied? Prep & Clean wasn’t allowed to dry completely before applying I’m A Base, natural oils left on the nail (improper prep), the free-edge wasn’t capped or sealed during application.
Used as a system for 21-day, gel polish manicure, or as the colour coat on top of any other artificial product.
Gel Polish Manicure Instructions:
- Start with a prepped and clean natural nail.
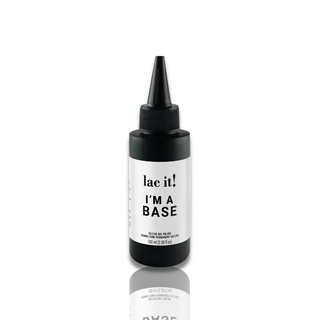
- Apply a thin layer of I'm A Base, ensuring to cap the free-edge. Cure 60 seconds LED or 2 minutes UV.
- Apply a thin layer of the lac It! colour of your choice, capping the free edge. Cure 60 seconds.
- Apply a second thin coat of colour if more coverage is desired. Cure 60 seconds.
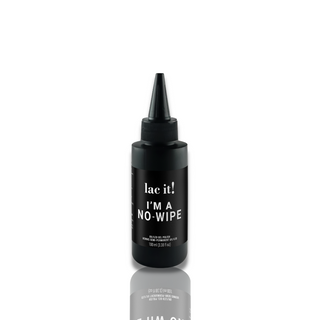
- Add any nail art or glitter if desired, cure, and then finish off with I'm A No-Wipe or I'm A Matte, making sure to cover the whole nail side wall to side wall and capping the free-edge. Cure for 60 seconds.
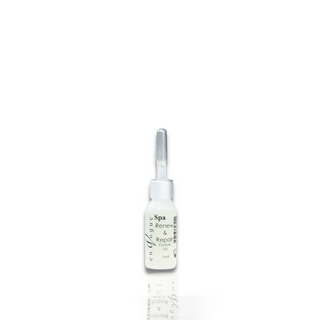
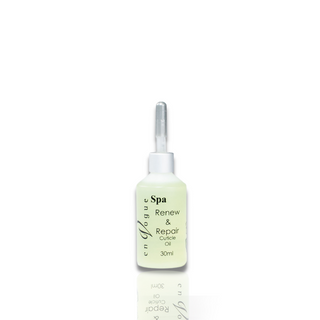
- Let it rest for 30 seconds and then finish with Renew and Repair Cuticle Oil.
15ml
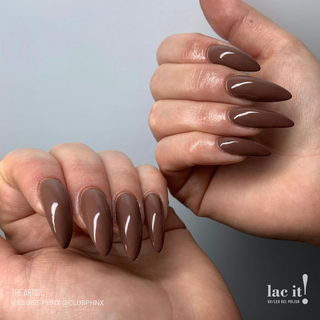
A warm medium brown crème with subtle mauve undertones


Adding product to your cart
- UV/LED true gel polish with a 100% gel base for maximum durability and longevity
- Highly pigmented formula for superior color payoff, requiring fewer layers and saving time and money
- Premium quality product offered at a lower than market average cost, providing a great quality-to-price ratio
- Pro-grip handle designed with professionals in mind, ensuring a velvet smooth, slip-free application
For darker pigmented colors, we recommend 1-2 coats for full coverage.
For lighter/shimmery colors, you can build coverage with 2-3 coats or layer to add a little sparkle.
To ensure complete polymerization, usage of the light supplied by the manufacturer (en Vogue Nails) which matches the chemistry is highly recommended. Position the nails correctly under the lamp throughout the polymerization cycle and the appropriate length of curing time instructed by en Vogue which is tested to be full proof and effective for long lasting nails.
The appropriate times allocated to cure each layer of gel ensures correct polymerization.
DISCLAIMER
APPLY GEL IN THIN LAYERS
The gel must be applied in thin layers in order for the product to polymerize completely during the curing process.
Due to the nature of the ingredients, gel polish can cause a skin reaction when in contact with the skin. Gel polish should be used with care to maximize the product benefits without compromising the health of the skin around the nails. Here are our top tips to minimize the risk of a skin reaction.
Especially note when using very pigmented, opaque, highly pigmented or white-based gels, which block out more light. Gel applied too thickly will not polymerize completely and may cause a skin reaction.
We strongly advise you to cure all your en Vogue gels with the en Vogue Evolution and infusion lamp have been created and designed specifically for optimal curing of en
Vogue gels. If you experience a skin reaction, tingling, itching or notice a change in the appearance of your nails after using the products, remove the gel immediately and discontinue use until fully recovered.
We recommend removing your gel as soon as possible using the en Vogue
recommended technique and stop using gels immediately. We also recommend consulting a health care professional.
GEL REMOVAL
If nails have been damaged by forcing or peeling gel during removal, allow nails to fully regenerate before reapplying gel. If the natural nail is thinned too much, the ingredients
in the gel can penetrate through the weakened keratin layers which may cause a skin reaction.
PROTECTION
For lac it! Manicures, en Vogue recommends adding a protective coating of Fibre Gel to the nails for extra strength and protection from gel polish application/removal. Look for a step-by-step tutorial on our YouTube channel, @envoguenailsofficial.
Why is it hard to remove/taking a long time to soak-off? The seal wasn’t broken before soaking, the color of base coat application was too thick initially, it’s not being soaked for long enough.
Why is it rippling/wrinkled when it comes out of the lamp? Application was too thick, or it was under-cured. (Apply two thin, even coats and cure fully for 60 seconds LED/2 mins UV in a high-powered lamp).
Why is it not curing fully? It was applied too thick, not cured for the full time, or the UV/LED lamp is too weak. (If using a lower wattage lamp, try double-curing your products to ensure a full cure.)
Why is it chipping/peeling? The nail plate wasn’t properly prepped pre-application, I’m A Base was too thick or improperly applied, the free-edge wasn’t capped when applying product.
Why is it shrinking when being applied? Prep & Clean wasn’t allowed to dry completely before applying I’m A Base, natural oils left on the nail (improper prep), the free-edge wasn’t capped or sealed during application.
Used as a system for 21-day, gel polish manicure, or as the colour coat on top of any other artificial product.
Gel Polish Manicure Instructions:
- Start with a prepped and clean natural nail.
- Apply a thin layer of I'm A Base, ensuring to cap the free-edge. Cure 60 seconds LED or 2 minutes UV.
- Apply a thin layer of the lac It! colour of your choice, capping the free edge. Cure 60 seconds.
- Apply a second thin coat of colour if more coverage is desired. Cure 60 seconds.
- Add any nail art or glitter if desired, cure, and then finish off with I'm A No-Wipe or I'm A Matte, making sure to cover the whole nail side wall to side wall and capping the free-edge. Cure for 60 seconds.
- Let it rest for 30 seconds and then finish with Renew and Repair Cuticle Oil.

![En Vogue Lac It! [Cocoa Bean] 100% gel nail polish swatch](http://envoguenails.com/cdn/shop/products/CocoaBeans.jpg?v=1683661268&width=320)
![En Vogue Lac It! [Cocoa Bean] 100% gel nail polish bottle](http://envoguenails.com/cdn/shop/products/R_Cocoa_Bean.jpg?v=1683661268&width=320)
![En Vogue Lac It! [I'm A Base] 100% gel nail polish bottle](http://envoguenails.com/cdn/shop/products/R_IM_A_Base.jpg?v=1681313901&width=320)
![En Vogue Lac It! [I'm A Matte] 100% gel nail polish bottle](http://envoguenails.com/cdn/shop/products/R_IM_A_Matte.jpg?v=1681313880&width=320)
![En Vogue Lac It! [I'm A Matte] 100% gel nail polish manicure](http://envoguenails.com/cdn/shop/products/Black_beautybybeccarose_1.png?v=1681852241&width=320)
![En Vogue Lac It! [I'm A No-Wipe] 100% gel nail polish bottle](http://envoguenails.com/cdn/shop/files/R_IM_A_No_Wipe.jpg?v=1685553592&width=320)
